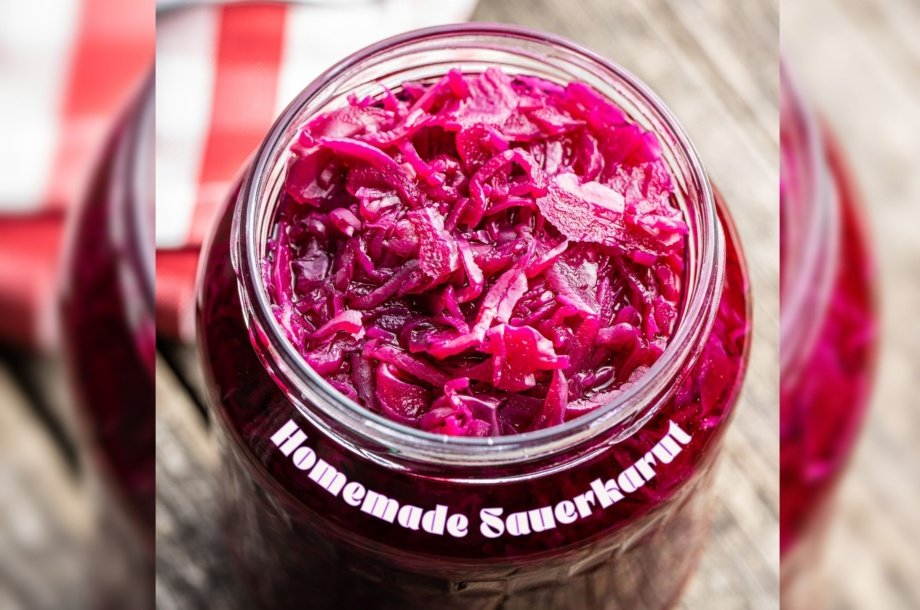
Comprised of only cabbage and canning salt, fresh, unpasteurized sauerkraut is tangy, beautiful, and complements sweet and savory dishes like veggie sausages, veggie-dogs, and sandwiches. It also adds pizzazz to soups and salads. Plus, it is super-healthy:
- Fermentation creates the probiotics that are so good for gut health.
- Low-calorie, no-fat, high-fiber.
Note: sauerkraut is high in sodium; rinse salt from brine and moderate if appropriate.
Available fresh in the refrigerated section of some farmers markets and grocers, it remains tangy and crisp in your fridge for 4-6 months.
Cabbages are plentiful at farmers’ markets these days, so you can make your own.
To be clear, making sauerkraut is a project that requires the right tools, effort, patience, and place to store a crock. It’s messy at the beginning and very messy/stinky at the end.
Tools needed:
- Sauerkraut crock including a lid (scrub cleaned) – often available used, but make sure they are not cracked.
- Masher (aka Stomper).
- Weights – a plate and bricks (in a ziplock bag) will do.
- A large sharp knife – some prefer a mandolin.
- Elbow grease, aka effort.
- A place to store the crock for 3+ months, the longer the tangier: cool and dark, and where its pungent fermentation won’t be a problem or attract critters: a root cellar, basement, spare room, attic (that doesn’t freeze or get hot).
- A way to move the heavy, unwieldy full crock from your preparation site to storage spot.
How to make sauerkraut:
- Prepare all tools and have a family-approved plan as to where the crock will live.
- Clean cabbage heads – 5 or more make it worth the effort.
- Carefully peel off outer leaves, setting aside for future use. Discard damaged leaves.
- Shave cabbage in 1/8” slices, separating the pieces.
- Place 3-5 handfuls of cabbage shreds into the crock; then sprinkle with ~2 tablespoons of salt. A shockingly large amount.
- Push hard and twist the cabbage-salt mixture until flattened, 2-3 minutes.
- Repeat adding cabbage, salt, pressing and twisting.
- By the 2nd-3rd layer of very hard pressing/twisting, salty brine should start to appear. Good!
- Keep shredding, fluffing, adding to the crock with salt, pressing and twisting. It’s a lot of work.
- Brine will start to cover the cabbage. You want 1-2 inches of it.
- When all the cabbage is in the crock and you’ve got plenty of brine, you are almost done the hard part.
- Place the weights atop the cabbage and brine. Make sure at least 2 inches of brine is above the weights. If not, add salty water to fully submerge everything.
- Place the cover on top.
- Move the crock into the secure location for the next chapter.
- Let it ferment – without peaking!
When you are ready to deal with it:
- Practice holding your breath.
- Carefully move the crock back into the workspace, ideally outside.
- Have a large bucket ready.
- Open the lid and look at the nastiness. It should be green-blue moldy and slimy and really disgusting. Perfect.
- Using a turkey baster, slowly suck out the brine on top. Try not to slosh anything.
- Remove the weights and set aside to clean later.
- Slowly remove the large pieces of cabbage and the top layer of cabbage. It’s awful looking and smelling. You are positive that you screwed up, but you did not.
- Keep slowly scraping.
- Suddenly, the cabbage looks crispy and jewel-like. It’s sauerkraut. Congratulations!
- Compost the nasties.
- Rinse the good stuff, removing as much salt as possible.
- Enjoy, refrigerate, or can up for later.
Tips:
- Make sure your knife is very sharp.
- Set aside time for this project. It sounds simple, but it’ll take a few hours.
- Any kind of cabbage works – we prefer red/purple cabbage, as it is sweeter and beautiful on the shelf.
- Makes fantastic gifts.
- Only use canning salt, others will cloud the brine.
- Add in beets, carrots, daikon radish, dill or rye seeds for variety.
- Kimchi includes additional ingredients, but is a similar process.
Enjoy!
Planetarily,
Laura & Gil
Our friends Laura & Gil Richardson are, in their own words, “imperfect” but they are much further down this Planetarian path than anyone I know. They are a treasure trove of sustainable living inspiration and we’ve asked them to share one simple swap per week that they’ve made (and the products they love) in hopes it might inspire you to make them, too.